Details of a Scarf
To start, thread the beads onto the yarn. I used about 200 beads and about 200 yards of yarn for the scarf. Cast on and do a few rows of garter stitch or other pattern of your choice. I did some eyelets, but since I was making it up as I went along, I can't recreate it here :(
There are 4 rows to the pattern. K1b means make a beaded stitch (instructions below); if you're not using beads, it's just a K1. When I made my scarf, I would do one set with beads, then 4 sets without.
Row 1: Knit all stitches.
Row 2: K1, *yo, K1b*, rep from * to * until 1 stitch remains, yo, K1.
Row 3: *K1, drop yo from needle*, rep from * to * until 1 stitch remains, K1.
Row 4: Knit all stitches.
Repeat until scarf is desired length, then do a few more rows of garter stitch or other pattern of your choice. Bind off and admire your creation :)
The WIP in the pics below is going to be a headband...I cast on 7 stitches and I'm using 2 beads in each stitch.
So here is a K1b:
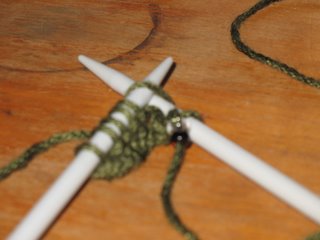
1) Place the right needle behind the left through the loop -- this is preparing to make a knit stitch. Slide the bead(s) close to the needle.
2) Make the knit stitch and be sure that the beads are included in the new loop.
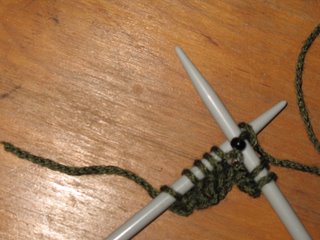 3) Slide the loop off of the needle (finish the knit stitch as usual).
4) Before you turn your work to continue to the next row, make sure that all of the beads are on the part of the stitch that is facing you.
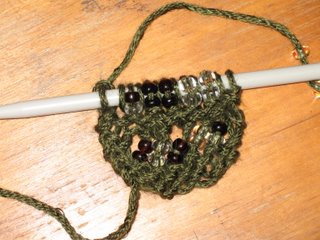
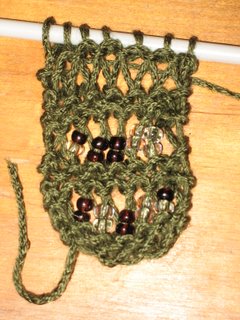
4) After you have finished row 3 of the pattern, it should look something like this (picture has 3 repeats of pattern: 2 with beads and one without)...
Just a few things I've figured out:
- If you put the beads on the yarnovers they will not (for some reason) end up on the drop-stitch part.
-If you put beads on the first or last knit stitch of a row you will get bulgy edges.
- The pattern is written for making rows of beads...but you can of course sprinkle them in wherever you would like.
- The pattern is also written so that all of the beads end up on the same side of the scarf...if you want to alternate them, there should be an odd number of rows between them. You can make a 5-row pattern, with row #5 being knit all stitches.
The end!
posted by bek at 6:12 PM
![]()

0 Comments:
Post a Comment
<< Home